I am going to post the information about Birdland Paradise here as it is another Frismos breeding game that features birds instead of sea creatures. Shadowfish and I have a new Club in Birdland Paradise named Freyashawk, not because I am an egomanic but because I thought new players might recognise the name from other Frismos games and join.
To be honest, Shadowfish is much more experienced than I with respect to Birdland Paradise as she has played consistently for many months, where I basically installed the game, discovered I was spending far too much money on it and avoided it afterwards until she asked me if I would be interested in playing again.
Of all the Frismos games that I play, Birdland Paradise is the most dangerous in my opinion in the temptation to spend real money. You will not be forced to do so, but breeding appears to be so random that the weak-willed may indeed, like me, be induced to spend money to move forward faster where various Goals are concerned.
The basis of all these games is breeding. You make money by visiting Friends and by opening gifts that your friends send to you as well as from the sale of creatures that you have bred yourself. The other important aspect of the game and one which will allow you to advance in level and in the acquisition of coins and premium cash is the Goal List. When you achieve any Goal, you will receive valuable rewards consisting of Experience Points, Coins and/or Premium Cash. In Birdland Paradise, the Premium Cash takes the form of Feathers. In Fish Adventure Seasons, it is Seastars.
Unlike Age of Pyramids and Creatures of Olympus, where the breeding combinations achieve specific results that will be different creatures from the parent creatures for the most part, Fish Adventure Seasons and Birdland Paradise are all about colours. You will not obtain a different specie when you breed but rather may obtain a new colour or new colour combinations.
In Fish Adventure Seasons, colour is created partly by the colours of the parent fish and partly by the use of Elixirs. There are no Elixirs in Birdland Paradise, more's the pity.
How then do you obtain new colours in Birdland Paradise through breeding? Basically, the only method by which to breed your Birds is by spinning a Wheel. The results are partly random but can be determined partly as well by the place where the spinner lands.
Now, it is here that I need to make an important point about the connection between Breeding Goals and the Birds that you choose to purchase in the Market. I made a colossal mistake in my first game because I bought Birds in colours that I liked, using the valuable Feathers from a special promotion rather than using Coins. For example, I bought a Purple Cockatiel for 35 Feathers. There is a Purple Cockatiel, a Blue Cockatiel and a Green Cockatiel, each for 35 Feathers. Then there is the plain Cockatiel, a multi-coloured bird, for 1200 Coins.
You will find two early Goals ask you to create a Fiery Cockatiel in Red and Yellow and another one to create a Grey and White Cockatiel. Well, unless you have a male and female Cockatiel that has those colours (the 'plain' Cockatiel in fact), you will be hard-pressed to create a bird that contains only Red and Yellow or Grey and White.
Of course, I was able to breed beautiful birds using my Purple Cockatiel and one always can sell them but I was unable to achieve the two Cockatiel Goals until I had two of the 'plain' multi-coloured Cockatiels!
Spinning the Wheel
xxxxxxxxxxccxxxxx
In order to breed your birds, you must have an Adult Male and an Adult Female and neither can be hungry. Hungry Birds will refuse to breed.
Note here that Breeding Goals tend to be based on the birds in the Market that are Coin purchases. Early Goals are breeding Budgies, Love Birds, Cockatiels and Macaws. To achieve the colours that the Goals require, you should buy a pair of Birds that can be purchased for Coins. The exotics that require Feathers are NOT featured in these early Goals.
Now, to actually Breed the birds, do the following:
Tap on the Heart at the bottom of the screen to see all the available Birds that can be bred. When you choose a Male, all Females of the same species that are available for breeding will be shown. Choose one and tap 'Start Breed'.
The Wheel will spin. There are different types of results where the spinner can land. The largest part of the Wheel usually is the plain yellow with a speckled yellow Egg Icon in the middle. If your spinner lands there, you will not achieve a new colour combination. Instead, the Egg you obtain will hatch into a bird that is identical either to the Father or the Mother.
The second largest section will be green with a multi-coloured Egg Icon in the centre. This part of the Wheel gives a Club Bonus as well. The percentage of the Club Bonus is determined by the number of times that all members have used the Wheel. The more active members that your Club has, the better the results in terms of new colour combinations.
Finally, there is a small portion of the Wheel with the label 'Special'. This is the Rainbow outcome. If your spinner lands in the Special Section, it will activate a time-limited Rainbow option in a new Wheel. This is the Wheel that is most likely to give you NEW colours. When you spin the Rainbow Wheel, the largest section will give you a colourful Egg that may contain a variety of colours of both parents or a completely different colour. The smaller portion of the Wheel will give you a colour change Bird that will flash beautifully with all colours. The colour change Bird will NOT be breedable, however! It is strictly ornamental.
Many of the Goals in the game are colour-related. You may be asked to produce a bird of a specific solid colour or a bird of two colours. As previously indicated, the colour or colour required by the Goal is one or more that are included in the Birds that can be purchased for Coins. Once you have a Male and Female that contain the required colour or colours, you need to breed them by spinning the Wheel. The only way to achieve the Goal is by spinning the Wheel until you obtain an Egg that hatches into a Bird of the designated colour or colours. Your best chance always is if you activate the Rainbow Wheel.
Note that there always will be an option to respin the Wheel. The price for doing so is always premium cash. It will begin with 1 Feather but will increase if you continue to respin. You do need to respin the Wheel occasionally to achieve specific Goals in the game but I personally find that it usually will not result in a better position on the Wheel. You can spend up to 5 Feathers, respinning the Wheel multiple times if you landed on the speckled plain egg section the first time only to land in the same section again and again.
Gaining Experience
xxxxxxxxxxxxxxxx
In all of these games, new options are unlocked by increasing your 'Level' which is based on the total number of Experience Points you have earned. In Birdland Paradise, higher levels mean new birds in the Market, new Themes and Decorations.
Our group in Birdland Paradise is Freyashawk and one of our members, Viola's Birds has a great tip for players. Instead of performing your visits by going from friend to friend, go home each time and access the Club list from your home. You will find that your own feeders will need refilling and you will be able therefore to earn extra experience each time you perform this action. It is more time-consuming, but Viola's Birds earned 10,000 Exp in one day by doing this!
Saturday, 4 February 2017
Tuesday, 17 January 2017
New Black and White Fish Tank Contest
I am sorry I neglected to take some screenshots of our wonderful Christmas and New Year Contests but our current contest is for a fish tank in black and white.


The contest only began on Monday but here are some screenshots of the tanks of a couple of our most valued members: Shadowfish and Ginny.
I found myself far more excited about this game when I reached Level 10 and unlocked the Elixir game, a sort of mini-game that gives players Elixirs in special colours as well as the Magic Elixirs tht produce a colour-change effect. Unfortunately, there is no Black or White Magic Elixir because I think that would be a dramatic flashing effect, but the Black and the White Elixirs are found only by playing the Elixir Game.
You have to use your own basic Elixirs to be able to play the game. Usually, you are required to 'bet' two of the Red or Green Elixirs but only one of the Blue or Yellow Elixirs to have a chance to obtain either a special Elixir or a rare Magic Elixir. The 'board' consists of three shelves with Elixirs in Bottles. The Magic Elixirs ordinarily occupy only the first two slots on the top shelf. The fairly uncommon colours are contained in white bottles and are White, Purple, Pink and Black occupy a random number of positions on the bottom shelf and sometimes one or two on the middle shelf. The rest of the slots are taken by colours that include Orange, Brown, Dark Green, Dark Blue and Lime. It is a pity that one cannot use these colours to make bets as it is more likely that one will 'win' one of these than one of the Elixirs in the white bottles or a rare Magic Elixir.
The primary basic Elixirs are Red, Green, Yellow and Blue. Fish that are sold in the Market sometimes will be sold in primary colours, but often the varieties that are bought with Premium Cash in the form of Seastars will be rare colours, either in combinations or as solids. The primary purpose of the game really is to breed different colours of fish.
Our Group, named Harvest Moon after one of my favourite series of games, runs contests periodically to encourage players to try different colour combinations. Contests promote visits to neighbours and group members to see what they have accomplished as well as promoting conversations between group members. Finally, it is fun to see how creative other players can be in decorating a tank for a contest or the types of fish they choose to include in that tank.
As previously indicated, we currently are using a black and white theme for our contest. It is a challenging and difficult theme in a way because the Black and White Elixirs are rare and beyond that, it often is difficult to superimpose black or white on a fish of a different colour. Even in cases where you can purchase a white or black fish, it can be difficult to create a combination of black and white.
How does one accomplish this? Well, you can breed a solid black fish with a solid white fish and hope to obtain an egg that is both black and white. More often, however, a player will use a Black or White Elixir to add one of those colours to a breeding combination. Some solid colours are more tenacious than others, I have found and particularly where certain species are concerned. You can buy both a solid white and a solid black Goldfish in the Market for example, but when more often than not, I would obtain a solid black or white Goldfish egg by breeding the two. Even when I added a Black or White Elixir to the breeding pair, I did not receive a result that combined black with white.
One of our group members discovered one of the secrets of the game early. Shadow declared that it is far easier to obtain a new colour combination using the offspring of the original purchased fish than it is to obtain a new result from the fish you bought in the Market. In other words, if one purchases both the Black Goldfish and the White Goldfish and breeds them together, the most likely result witll be a solid White or a solid Black Goldfish. The next time round, though, do not breed the two original fish. Instead, use the offspring once the fish reaches breeding age or adulthood. You are more likely to receive a mixed colour combination from a fish that has parents of BOTH colours than if you use the original solid fish. This is even more likely with the next generation.
If you want fish that are identical to the parent fish, use the original fish purchased in the Market but when breeding for new combinations, always try to use the offspring. The further down the family tree you go, the more likely you are to obtain an interesting new result.
The interesting discovery I made, though, was that I had wasted my Black and White Elixirs basically on inexpensive, fast-breeding fish like the Goldfish and the Bettas. I had as much chance of obtaining a mix of black and white when I simply bred a black fish with a white fish as I did when I added a Black and White Elixir. I daresay this is not true in terms of actual probabilities but the advantage of using an Elixir in such a case is not worth the price. If, however, you are adding a NEW colour, then you do need an Elixir. But in terms of two fish that are solid and have the colours you want, breeding an egg that has both colours does not appear to be more successful an effort when you use a White or Black Elixir.
Your White or Black Elixirs, therefore, should be used initially to ADD Black or White to a breeding effort where the two parent fish do not have those colours. If the Elixir you use is a Magic Elixir, the result will be an egg that is the colour of the Elixir. The two colours of the parent fish will not be displayed, but the fish with the colour change will still have the genes of the parents and those colours are not lost. When you breed the Magic colour-change fish with another fish, one of the original parent colours may reappear as a partial result. The Magic Elixirs are dominant, however, and it is more likely that even in breeding it in the next generation, the result will be another colour-change Fish. To me, that is the best possible result. It is difficult to obtain the Magic Elixirs and if they did not carry through to the next generation at all, it would be quite sad!
What is really beautiful to me is the result where an egg has partial colour-change but has one or more other colours as well. I have seen something else with respect to the Yellow Magic Elixir. Often, you will see one of the colours of the parent fish flashing inside the Yellow Magic colour, or on the borders of the fish. It is quite a lovely effect. I initially was not that fond of the Yellow Magic, finding the Blue and Purple more beautiful. Now, however, if I breed a fish that has more than a couple different colour spots on it, Yellow Magic can produce some fabulous results.
You see, every type of fish has a set number of places on its body that can display different colours. Usually the maximum number of colours any fish can display is five and they always are in the same locations on that fish. Even when the fish is a solid colour, those colour locations still are active and may produce a different colour in the next generation.
For example, the Goldfish can have different colours in the following location: top fin, lower fin pair, upper body, lower body, tail. The Black Goldfish that you buy int he market may be solidly black but if bred with a goldfish of another colour may produce a result that shows the other colour in one of those locations. Goldfish are fun to breed because they breed quickly and because the colour combinations are almost endless.
Fish Adventure Seasons has a list of Goals that sometimes can give valuable rewards. One of the Goals usually is to breed a specific number of fish (unspecified types) and another is to sell a specific number of fish. Breeding and selling Goldfish can be the quickest way to achieve these Goals, although they do not have a high XP value, so your level will not increase as quickly if you only breed Goldfish as it will when you breed more valuable fish.
Monday, 31 October 2016
Halloween Contest Winners
I created a group or clan in Fish Adventure Seasons. These groups are designed basically for sending gifts to one another, but members can become friends and beyond that, I decided it would be fun if we had a Halloween Contest... so I announced it and there were some incredible results.
Here are some screenshots of some of our best Halloween aquariums and their fish:
The winners would have to be: Shadowfish, Gigi's Fish Bowl and Jediknight. They took on the challenge and created some marvels.

 Shadowfish's Halloween Tank, two views.


Gigi's Fish Bowl, aka Georgann... two views.
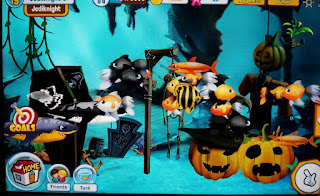 Jediknight
And here are a couple of my own Halloween Fish... don't think I deserve to be in the winning group but I have a couple of nice Mermaids and Dragonfish in Halloween colours:

 I am partial to mermaids... but my tank is so packed that you barely can see them.
Here are some screenshots of some of our best Halloween aquariums and their fish:
The winners would have to be: Shadowfish, Gigi's Fish Bowl and Jediknight. They took on the challenge and created some marvels.


Gigi's Fish Bowl, aka Georgann... two views.

And here are a couple of my own Halloween Fish... don't think I deserve to be in the winning group but I have a couple of nice Mermaids and Dragonfish in Halloween colours:


Thursday, 29 September 2016
Free your Fish!
I am very much a collector or hoarder by nature, sentimental in the extreme, and I therefore find my tanks filled to capacity at all times, mainly with the gorgeous Mermaids one can breed at Level 15 and higher. I do see, however, that if you wish to increase your Levels, selling fish is the way to go. You do not earn the XP by breeding them but by SELLING them.
Sunday, 18 September 2016
Important Point about Gifts
Gifts are important in Fish Adventure Seasons, but if you allow plants to be placed or to fall in front of your Gift Box, you will not be able to receive ANY Gifts at all. This partly is the fault of the game itself. Whenever you open a gift, if it is a plant, it will fall into the tank in a random position. Often, it will fall in front of your Gift Box. After opening your Gifts, always make certain that the Gift Box is clear of any obstructions. Plants are nice, but they can be an impediment where gifts are concerned.
Saturday, 20 August 2016
Fish Adventure Seasons 101


This post is dedicated to my dear friend, Georgann, who started to play this game because I recommended it!
Basically, as with any of the 'farming simulation' type games, progress is based on your Experience Level. You will need Coins in order to buy new items, and thus the ability to earn Coins is linked to progress as well.
When you first download and open the game, you should give yourself a 'nickname' that is unique. Otherwise, you will have a default name that begins with Player and is followed by a series of numbers.
Look at the icons at the bottom of your screen. There will be a big icon for Shop, followed by Friends, Tank, Breed. When your level increases, a Club icon will be added.
For now, however, go to the Friends icon and tap on it.then tap on the Profile Tab. See the little pencil icon? Tap on that and you will open your keyboard to create a nickname. Do that. Now you need to find Friends. If you know a friend in the game, you can go to Community and perform a Search for the Friend by name. Otherwise, go to Community and choose some Friends randomly. There are a number of advantages to having Friends. One is the ability to visit them to collect Rewards daily. The other is to allow them to visit you to deposit gifts into your Gift Box. Gifts are invaluable. They can consist of Coins, premium Cash in the form of Seastars, Decorations that can be placed or sold and Elixirs.
You can add and remove friends on a daily basis, but when you find Friends who leave gifts for you on a regular basis, those are Friends that you need to keep. The idea of the Clubs or Clans is to have a group of active players who all reciprocate in regular visits. Unfortunately, many of the Clubs are not very useful. My club is Harvest Moon and as I am willing to accept any one, some of the members are not very useful but I have not reached the limit of 50 Members so delete no one as long as they do not cause any disruptions.
To visit a Friend, simply go to the Friends icon, find your List and tap on a name. You will be transported to that Friend's aquarium. Here you can clean the tank if it is dirty for 9 points, empty the Coin Shell for Coins and possibly an Elixir (random), and then tickle or pet the fish there for 1 Coin each. You can feed the fish if they display the fish food icon, although you will not gain points or coins for that. What it does do, however, is allow you then to earn Coins by interacting with the fish by petting it. A hungry fish will not be interested in your tickling!
Before you leave your Friend's tank, make certain that you tap on the Gift Box to leave a gift. You can choose any colour or shape. I do not think the colour or shape determines what is inside the gift frankly. I always choose the gold treasure chest and it can contain anything!
If your Friend has more than one tank, visiting each is a good way to increase your XP when your Levels are low. More likely than not, many of those tanks will need a good scrub with your sponge!
This game is all about Colour. New species can be unlocked either by advancing to higher levels or by finding new items in the 'Featured' section of the Shop. This is where high level types of fish are offered temporarily to EVERY player for the most part, usually for premium cash. The Whale, for example, was featured last week.
When you return home, what you want to do, especially at the start, is BREED and SELL. The Goldfish are wonderful for this. They can be bred every five minutes. Every type of fish takes time to recover after breeding but the Goldfish takes less time than any other species. After breeding, an egg will drop to the bottom of the tank. This egg will display the colours of the goldfish that will hatch and it should hatch in 2 minutes.
Speed Option
xxxxxxxxxxxx
You can speed the process of hatching and growing a fish as well as restoring a fish that has been bred to the point where it can breed again by using your premium cash or Seastars. There is a point, however, where you will be given the option to speed the process free of charge. To see this, use the general tank menu that is found by tapping on the fish icon on the top right of your screen. It will tell you the precise time when any fish egg will hatch, any immature fish become adult, any bred fish be restored as well as the current cost of speeding any of these options.
The Speed-up is a way for the game to make money quickly in my opinion. One can become very impatient with an Egg that will take 17 hours to hatch, as with the Mermaids and it is a temptation to pay to speed the process. Try to resist. Your premium cash is better utilised to purchase species that cannot be purchased with coins.
When Should you Spend Premium Cash/Seastars?
xxxxxxxxxxxxxxxxxxxxxxxxxxxxxxxxxxxxxxxxxxxxxx
I have mentioned this in passing elsewhere but perhaps it is worth making the point here as well. Try not to spend your Seastars on Speed options but rather use them to purchase species that do not have any variety that is offered for a Coin price. The Puffer Fish, for example, is an early option in the Market but ALL colours are sold for Seastars only. Here I would make another suggestion. The Puffer Fish will serve as an example. The following are sold in the Market:
Puffer Fish (yellow and brown): 23 Seastars
Neon Puffer: 44 Seastars
Bloody Puffer: 66 Seastars
G Puffer: 77 Seastars
The Neon Puffer is a lovely blue colour. The Bloody Puffer is red and the G Puffer is black and white. Buy the regular generic yellow and brown Puffer Fish for 23 Seastars, then use Elixirs to create the other colours. The most difficult colour to achieve will be the black or white but it can appear in any breeding experiment randomly. Do not be dazzled by colours in the Market. When a new species of Fish is unlocked or offered, look for the variety with the Coin price, purchase both a male and female and then work to breed the colours you like. This is the wisest course to follow, although it requires patience. To be honest, though, it works in your favour in other ways, because the sale of fish is oe of the ways to earn valuable XP. If you purchase the expensive colours instead of breeding them yourself, you waste Seastars that otherwise could be used for new species.
If you are willing to invest limitless amounts of cash on this game, the advise does not apply... but remember: the value of ANY Fish is determined only by species. Those expensive colours that you purchased with Seastars are worth no more when sold than the less expensive Coin variety of the fish. ANY Puffer Fish sells for 2500 Coins and gives 15 XP.
It is the icon on the very top right of your screen that will show you every fish in your Tank as well as all the Eggs. Each will display its gender, name, sell price and the amount of experience that you earn when you sell that fish. On the right side of the entry are two options: Move and Sell. If you have more than one tank, you can move any Adult fish to any of your Tanks. If you have only one tank, you can move it into the Inventory. That is essentially a storage space. Inventory is accessed, oddly enough, through the Shop Menu. It is the last entry in the Shop Menu. You can store up to 20 Fish and up to 20 Decorations in your Inventory.
The other menu that will display the fish in your Tank (but not the Eggs) is the Breed Menu. You will find this by tapping on the Heart Icon on the bottom left of your screen. Here you will see the Males on one side and the Females on the other. Tap on a Male and a Female to place them in the appropriate slots on the right side of the screen, then tap on Breed.
Another way of earning rewards of Coins, XP and Seastars is through the Goals Menu. This is accessed through an icon on the bottom left of your screen. It looks like a target with an arrow through the middle.
Goals are partly tutorials. Your first goals will be to breed and sell Goldfish of various colour combinations and to decorate your Tank. You can find a Decorations tab in the Shop. There are three colours of Goldfish in the Shop that can be purchased at Level 1 using Coins. These are Goldfish (yellow), Blue Fish and Red Fish. Only today, two premium colours were added in the form of Silverfish and Pitch Black Fish. By breeding different colours, you can create new colours and new combinations.
Remember your primary colours: Red, Yellow and Blue. Mixing these creates the secondary colours of Orange, Green and Purple. Randomly, you may obtain White or Black as well. The Goldfish have quite a lot of potential for different colour combinations. You have the body of the fish, the top fin, the lower two fins, and two possible colours for the tail. Crossbreeding can allow you to add new colours or attempt a new solid colour. Experiment with the Goldfish and you will know how to create special colours later for other species.
Perhaps it is because the Silver colour is new, but I have been unable to achieve any mixtures with it in crossbreeding so far. The offspring simply hatches to look identical to the parent, all silver. The Pitch Black, on the other hand, can be reflected in the offspring partially as a Black Tail, black fins or Black body... with colours from the other parent fish. I hope this will change to allow us to have partially silver Goldfish, if that makes any sense.
I made a mistake initially when Mermaids were offered as a special item because I was so enamoured with them that I neglected the goldfish. I could have created the colours I wanted on the mermaids far sooner had I crossbred more Goldfish first!
Although there is no reason why you should not keep some of your Fish, especially if they have a premium price in the Market, one of the primary goals in this game is to sell fish. You earn XP as well as Coins by doing so. Many of the Goals involve the sale of specific numbers of fish.
The Power of Elixirs
xxxxxxxxxxxxxxxxx
You will not have Elixirs when you begin the game, but they begin to appear quite early. I believe they will begin to appear randomly when you tap on a Friend's Coin Shell or open a gift once you reach Level 3. The basic Elixirs that you can receive in this way are: Red, Yellow, Blue and Green.
As I wrote in another post on this site, this game is based somewhat on the old Colour Wheel rules where primary colours can be mixed to obtain secondary colours and so on. The exception here is the addition of Green, a secondary colour, to the basic Elixir group.
An Elixir will not usually take over the entire fish that is being created but it will dominate the colour scheme for the most part. I have found the following to be true:
When breeding two different colours of fish, the offspring either will be identical to the father or to the mother, if no Elixir is used. This is the most common result.
Less frequently, when no Elixir is used, one part of the offspring will take on the colour of the parent it does not resemble most.
Example: You have a father with a blue body, red top fin, red and white tail, and blue bottom fin. You have a mother with a red body, yellow top fin, red tail and red bottom fin.
The most likely result will be a fish that is identical either to the father or the mother but sometimes, if the fish takes after the father here, you may find that the red top fin has become a yellow one (mother) or that the blue bottom fin has changed to red or even that the tail now has lost the white half.
Another possibility, and this is the one most breeders seek, is that the colour wheel will kick into motion, mixing blue and red into purple or red and white into pink... or whatever else can be done with the primary colours.
Now, if yiou added an Elixir, the colour of the Elixir will be dominant but not necessarily a total change. In other words, a Blue Elixir could act on ANY part of the offspring to transform it to blue or it could act as a colour wheel combination option, to change red into purple or yellow into green or act on the white to create light blue.
Colour Wheel
xxxxxxxxxxxxx
Primary Colours: Red, Blue, Yellow
Secondary Colours: Orange, Purple Green
Blue and Red equal Purple
Yellow and Blue equal Green
Red and Yellow equal Orange
Tertiary Colours: These colours are created by combining a Primary with a Secondary Colour. You will find these in the Elixir Slot Machine as the Lime Green, Brown, Dark Blue and so on.
Magic Elixirs
xxxxxxxxxxx
Until you reach Level 10, you will be limited to the basic Elixirs, although you can create ANY colour combination with or without elixirs really, if you are determined and with a bit of luck.
At Level 10, you unlock a gambling game that will appear on the right side of the screen below the other icons. It is a series of four shelves with 6 elixir bottles on the first and second shelves and three elixir bottles on the bottom shelf. The bottles take three different forms. Gold bottles always appear in the top left and their appearance can depend on the number of Elxiirs you are willing to wager. The white Elixir bottles always appar on the bottom shelf but you can add more on the second shelf by wagering more of your Elixirs. Usually in the past, when the game begins, there are no gold bottles at all and only three white bottles. Today, the game begins with two Gold Bottles at the top and a total of 6 white bottles on the second and third shelves.
How the game operates is that the cursor will jump randomly from one bottle to another. It will stop when you press or tap 'Bet'. At the very bottom of the screen, you will see the total number of basic Elixirs that you own. You can bet a combination or colours or only one colour but there is a limit to the number of Elixirs of the same colour that you can wager on one bet.
The brown bottles are the more common colours that are easily obtained by crossbreeding. Brown, Lime Green and Orange are some examples of these. There are more brown bottles on the shelves than other types.
The White Bottles contain rarer colours such as White, Black, Pink and Purple.
It is the Gold Bottles that contain the Magic Elixirs. These are colour-change Elixirs that will cause your fish to flash. Quite magical indeed. Among them are Blue Colour-Change, Purple Colour-Change, Yellow Colour Change and Red-Colour Change. There may be a Green one as well although i have not won one yet.
Two Elixirs usually is the minimum number you can wager to activate the 'Bet' button but today I have been able randomly to wager using only one bottle. Incidentally, the Elixirs you have won never can be wagered. The only bottles that will be available for wager are the basic Elixirs.
The first use of a Magic Elixir appears to transform the entire fish that is hatched into the flashing colour determined by the Elixir. It is only when THAT fish is bred that you can obtain a result that flashes only in one area. I have bred a purple-colour change Mermaid with the result of a child that had only stars and crown that flashed. In another result, only the tail flashed. Usually though, the entire fish will be another colour-change Fish. The Magic Elixirs are very powerful. Thank God for that! It would be sad if one went to all the trouble to obtai n one and then used it to have it overpowered completely by ordinary colours.
When to use Magic Elixirs
xxxxxxxxxxxxxxxxxxxxxxx
When you decide to use your Magic Elixirs is entirely up to you but I save mine for the Mermaids. In fact, in one aquarium, I am at Level 12, with two Yellow Magic Elixirs... I am trying to save both if possible. Mermaides are unlocked at Level 15. Mind you, there are many other species that are quite dramatic when a Magic Elixir is used. Even the little Goldfish can be wonderful when the colours flash.
Clubs or Clans
xxxxxxxxxxxxx
One of the early goals in this game is to find a Clan or Club to join. Finding a good Club/Clan can make a big difference as good active members will visit one another daily to leave gifts that randomly contain Elixirs, Coins, Decorations and even Seastars. Our Club is Harvest Moon. Any one at Level 4 or above is free to join without invitation. Level 4 is very easy to reach and the only reason to set a minimum limit is to make certain that the Club only has active players in it. After all, a good member will go down the list and add other members as their friends in order to visit daily.
One flaw of this game, in my view, is that fellow Club members are NOT added automatically. You actually have to add them manually. There is a limit to the number of Friends that you can have. Unfortunately, when I first began to play this game, I went through the Community tab to add players randomly as friends as I did not have the Club yet. You can delete friends but there is a limit to the number you can delete in any given time period. The reason one deletes primarily is to get rid of people who are not playing or who do not send gifts and more importantly, perhaps, to be able to add all Club members to the Friends List.
Elixirs are so much a key element in this game and the only way to obtain them is through the Coin Shells or inside Gifts. There are Clubs in most of the Frismos games I play and the same system of visiting and gifting, but none of the others are really vital the way the Gifts are vital in this game.
Useful Tools
xxxxxxxxxxx
I should have mentioned this sooner perhaps. To see the entire contents of your Tank, you tap on the fish icon with notepaper that is at the top right of your screen. This will show you a list of every fish in the current tank, its gender, its status and so on.
It is the tools on the bottom right of the screen, accessed by tapping on the gloved hand with extended finger that give you the tools to interact individually with each of your fish.
Tap on the pointing finger to see the following icons:
Fish
Move Arrows
Sponge
Pointing Finger
Bottle of Fish Food
The Fish icon is very useful. When it is active, you can tap on any fish directly to see its identity and status. You will have the following options: Rename, Move, Sell. The little menu that pops up will let you know how happy or hungry the fish may be as well as its name and gender. You can find this by using the general Fish List as well but sometimes it is more convenient to tap directly on a fish, especially if you wish to use a specific fish in breeding. Ofteh the little portraits of the fish in the main list or breeding menu are too small to show the colour of a small area, such as crown or stars on a mermaid. It is only when the fish is in the tank that these can be seen clearly. Thus, you can tap directly on the fish, find its name or rename it and THEN access the Breed Menu to breed it.
The Move Arrows allow you to move Decorations either within the current tank or to another tank or into Inventory to store them. It allows you to move any Fish to another tank or into Inventory.
The Sponge is used to clean either your own tank or a friend's tank when it is displayed as dirty. You earn 9 XP whenever you clean any tank.
The Pointing Finger icon is used to empty a Coin Shell, place a Gift in a Gift Box, access your own Gift Box or to pet or tickle fish either in your own tanks or in your friends' tanks. It is the primary action tool.
Finally, the Bottle of Fish Food is precisely that. When a fish is hungry, a tiny icon showing a bottle of fish food will hover above it. Use the Fish Food icon in the Menu to feed the fish.
Initial Full Walkthrough
xxxxxxxxxxxxxxxxxxxx
I started a new game on another device to log early goals and this is the result:
Feed your Fishes 0/2
Reward: 6 XP, 50 Coins
Empty Your Shell 0/1
Reward: 6 XP, 30 Coins
Make your Fishes Happy 0/2
Reward: 7 XP, 50 Coins
Breed a Baby Fish
Rewards: 1 Seastar, 8 XP, 60 Coins
You can breed a Gold fish by tapping on the Breed Button on the bottom of the screen which will take you to the Breeding Lab.
Your First Coral /1
Buy a Pink Coral from the Shop in 1st Tank
Reward: 2 Seastars, 8 XP, 60 Coins
The Pink Coral is the Cocoon Coral costing 80 Coins. It sells for 40 Coins and gives 3 XP
More Fish, More Fun
Buy 2 Blue Goldfish from the Shop in 1st Tank
Rewards: 8 XP, 60 Coins
Goldfish coloured in Yellow and Blue
Breed Yellow Fish and Blue Fish to get desired mix.
Reward: 5 Seastars, 4 XP, 80 Coins
Goldfish coloured in Red and Yellow
Breed Red and Yellow Fish until you get your fish
5 Seastars, 4 XP, 60 Coins
Selling Novice
On the top right corner, you will see a fish icon. Tap on it and it will take you to the Sell List. From there press the 'Sell' Button 0/1
Reards: 2 Seastars, 6 XP, 80 Coins
When you have completed a few of the first goals, you will go to Level 2 and more Goals will appear.
Now it is time for Red
Buy a pair of Red Goldfish 0/2
Rewards: 1 XP, 65 Coins
Time to Have Friends 0/5
Tap on the Friend Button on the bottom of your screen and from here go to Community Tab and add Friends
Rewards: 1 Seastar, 6 XP, 100 Coins
Novice Collector
Empty 5 Treasure Shells in friends' tanks
REwards: 1 Sesstar, 6 XP, 100 Coins
Cleaning Novice
Visit friends' tans and help them clean by selecting a sponge Tool from the Tool Menu and dragging it across the dirt until the tank is spotless. 0/1
Rewards: 1 Seastar, 8 XP, 80 Coins
Novice Gifter
Leave gifts for your friends in their Gift areas
Rewards: 6 XP, 70 Coins 0/5
Novice Tickler
0/15
Rewards: 1 Seastar, 7 XP, 90 Coins
Triple Coloured Goldfish
Try to breed pairs of fish containing Red, Blue and Yellow colours
Reward: 7 Seastars, 6 XP, 180 Coins
After completing a few of these, new Goals appear:
Novice Feeder
Feed 20 Fish
Rewards: 1 Seastar, 11 XP, 250 Coins
Novice Designer
Buy 7 items for your First Tank
Rewards: 1 Seastar, 3 XP, 450 Coins
Novice Spender
Spend 750 Coins
Reward: 1 Seastars, 3 XP, 750 Coins
Better Place for your Fish
Buy a new Theme for 1st Tank
Reward: 3 Seastars, 6 XP, 500 Coins
N.B. Buying new theme probably will give you the Novice Spender Goal as well.
The next type of fish, which is the Betta, unlocks at Level 3.
When you reach Level 3, you will see new Goals:
Your Second Fish Tank
Buy your second fish tank
Reward: 1 Seastar, 8 XP, 250 Coins
Home for Bettafish
Buy and place 2 Bettafish in second tank
Rewards: 1 Seastar, 13 XP, 800 Coins
Breed a Baby Bettafish in second tank
Reward: 1 Seastar, 15 XP, 500 Coins
Stealth BEttafish
Buy 3 Leptopsammias and place them in 2nd Tank
Rewrads: 2 Seastars, 9 XP, 500 Coins
Apprentice Designer
Buy 8 items and place in 2nd Tank
Rewards: 1 Seastar, 20 XP, 1000 Coins
Apprentice Spender
Spend 3000 Coins
Reward: 2 Seastars, 9 XP, 950 Coins
Make the Goldfish family bigger
Breed 5 pair of Goldfish in 1st tank
Rewards: 2 Seastars, 5 XP, 700 Coins
The 2nd Tank costs 600 Coins. 3rd Tank unlocked at Level 5. Fourth Tank unlocked at Level 7. Fifth tank unlocked at Level 9.
Bettas can be purchased for Seastars or Coins now. There are two Colours of Bettas that can be purchased for 600 Coins eash.
More new Goals:
Selling Apprentice
Sell 4 Fish
Rewards: 2 Seastars, 3 XP, 150 Coins
Monday, 15 August 2016
Why is the first fish the Goldfish?


Although i have been playing games for years and writing strategy guides for almost as long, sometimes the penny takes a long time to drop. I am ashamed to say that I did not pay sufficient attention initially to the Goldfish in Fish Adventure Seasons. The reason that the Goldfish are the very first fish to be available is because they constitute a sort of in-game tutorial on colour breeding. The cost of the Goldfish in the shop is very inexpensive as is the cost of breeding. Both are only 50 Coins. There is no other fish that is as inexpensive to buy or to breed.
You begin with the option of purchasing three different colours: Red, Blue and Yellow. The four Elixirs that are available as random items when emptying a Coin Shell or opening a gift are: Red, Blue, Yellow and Green. In other words, you are given the primary colours and one secondary colour in the form of Green.
In my first game, I was given a special offer that allowed me to buy Mermaids before I had unlocked them. They are unlocked at Level 15 ordinarily. I was so excited by the Mermaids that I ignored the Goldfish except to complete Goals that involved them. Now, in a different Aquarium at a lower level, I am experimenting with the Goldfish.
They are rather amazing. You really do not need Elixirs or the special Colour-change Magic Elixirs to create amazing new colours in this game.
At the top of this post, you will see some screenshots that show the current tank that is filled with the results of my breeding experiments. The first thing that occurred rather to my surprise was that I had obtained a goldfish with some pink in its body. I took that goldfish and attempted to bring more pink into the mix. I then tried to create purple. Rather unexpectedly, I received one black and red goldfish named Gizmo. (The game gives the fish default names.) Breeding Gizmo twice, I received two very different results from the same partner. The first was a fish that resembled the mother. The second was a fish that resembled Gizmo. This is breeding without any Elixirs. I experimented with the Elixirs as well. In this tank, I have not reached Level 10 and therefore cannot obtain the special Elixirs but I used the regular ones. They tend to be a little overpowering generally. It really is not necessary to use them apparently. You can obtain almost ANY colour without the use of Elixirs although you have to do a lot of breeding.
Essentially, this sort of inexpensive breeding is something the game encourages as well as the sale of the results. Sale of fish gives valuable XP. In the case of the goldfish, you do not earn many coins through sales but every tank has a maximum population of 30 and you do need the space if you are going to do a lot of breeding.
I take screenshots of the breeding laboratory in order to keep logs of my results. It is a nice little option in the game but results are erased every day to make way for new ones. If you do not keep your own log, you will have nothing. With the mermaids, I hoped to see which of the patterns related to the hair, the crown and stars, the top and the tail. I haven't spent enough time studying the eggs to know, however. I need to study the goldfish eggs to see which patterns relate to the fins, body and tail. My next experiment will be to try to obtain the colour white. That may be quite challenging. I expect the easiest way would be to use some Yellow Elixirs.
Subscribe to:
Posts (Atom)